Once your mail list is ready, you can create an email campaign to send to your list.
Go to Campaigns > Create Campaign

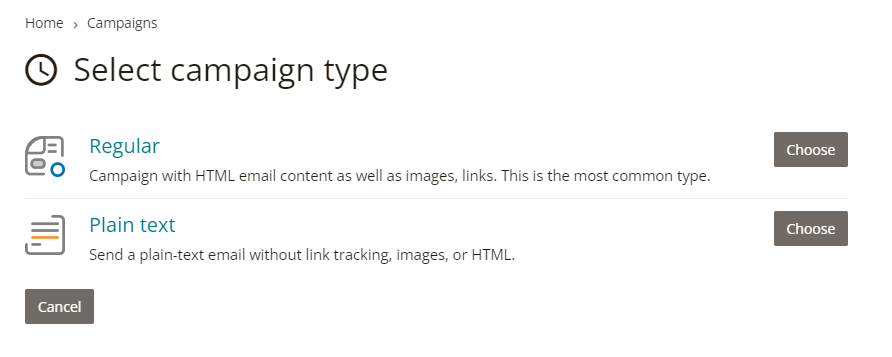
Than from the new screen choose if you want to send this campaign in HTML with images or plain text.
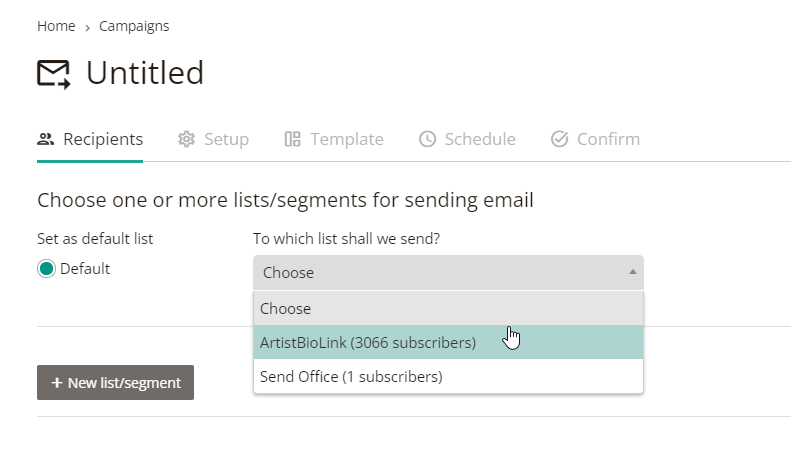
Recipients
On new screen you will find options and the fist thing is selecting the list you want to send your campaign too OR you can can create a new list/segment in here as well.
Setup
On next “Setup” tab, you will find settings for your new campaign.
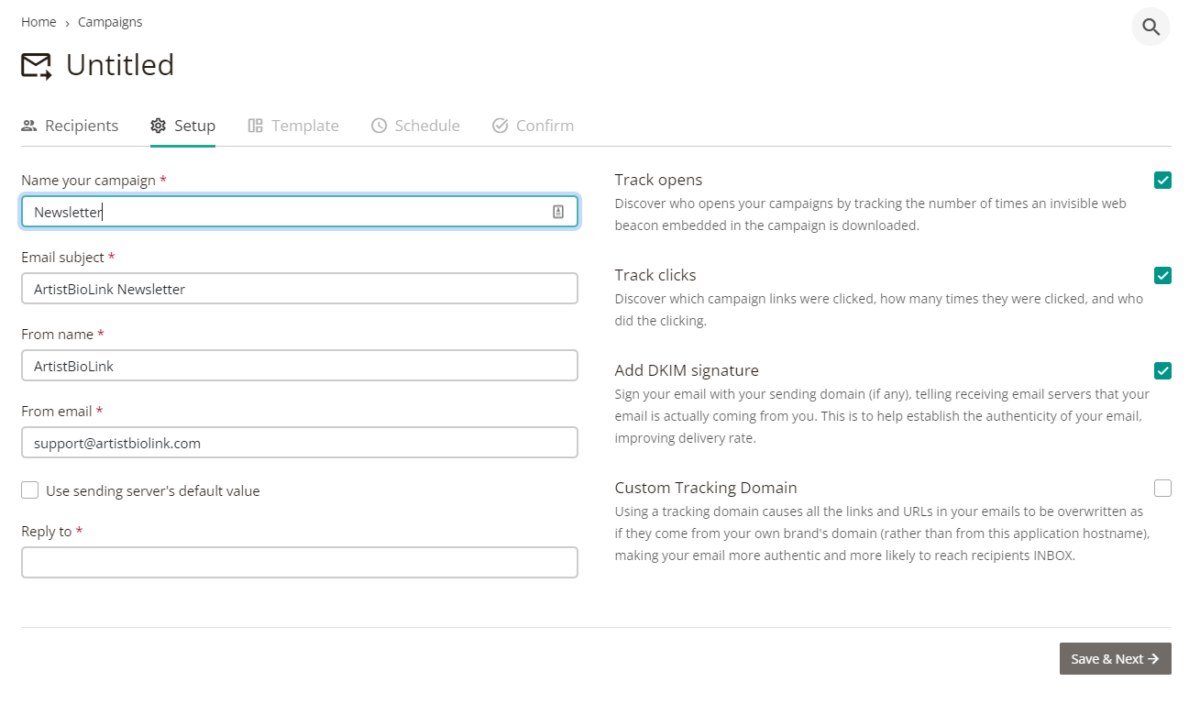
| Name your campaign | Any name you will choose, this will be internally used so can be anything. |
| Email subject | This will be the subject field of your email that receivers will see as well. |
| From name | This is what name should be seen on Sender field. It is a best practice to choose something that your receivers will know. Either your company name or your name if you are sending as public figure. |
| From email | This is the from field that senders will receive email from. This is important as any emails bounced will return to this address. So it is a good practice to choose the checkbox in there which is “Use sending server’s default value”. By choosing this, you do not need to deal with bounced emails and we will remove any undeliverable email addresses from your list for you. If you want to use your domain as sender you need to configure some more fields and need to add DKIM to your DNS records which we will describe later in here. |
| Reply to | This is the email address that your clients can reply when they click “Reply” on their email software. This address must be a human and process if any customers will reply. Can be your Support or Sales department. |
| Track opens | If you want to track opens, you need to choose this and we will add a transparent pixel to your emails. |
| Track clicks | If you want to click stats for the links on your email. You need to choose this. This will replace your URLs with our URLs as redirect. If you do not want this check “Custom Tracking Domain” below. |
| Add DKIM signature | This is a MUST as your emails will deliver with higher ratios. If you are sending from our domain, you do not need to do anything other than selecting this. If you want to use your domain, configuration will be available in here. |
| Custom Tracking Domain | If you prefer your email to have only your URLs, we have a solution for you as well which you can configure on your webserver. Follow this post to learn how to setup your custom domain tracking. |
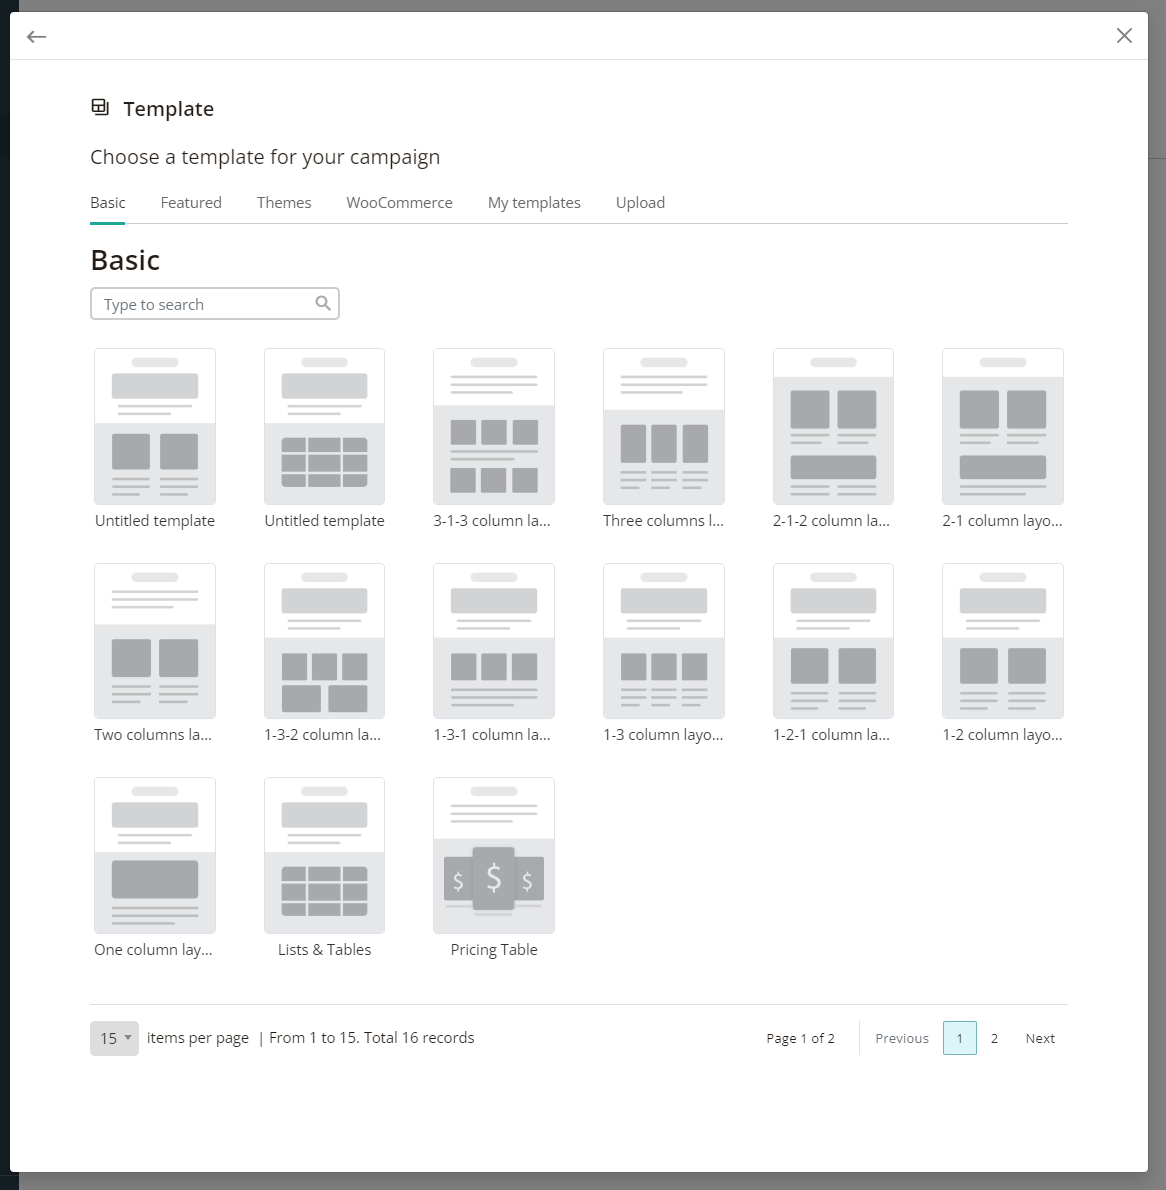
Template
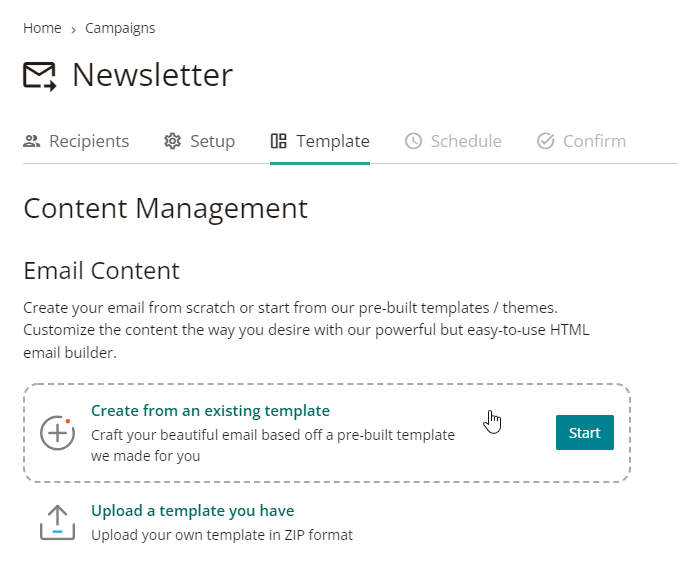
After clicking “Next” you will see “Template” tab. In here you can:
- Create from an existing template
- Upload a template you have
Create from an existing template
When you click on this you will see our templates that you can use:
Upload template you have
In this selection you can upload your own template as ZIP file.
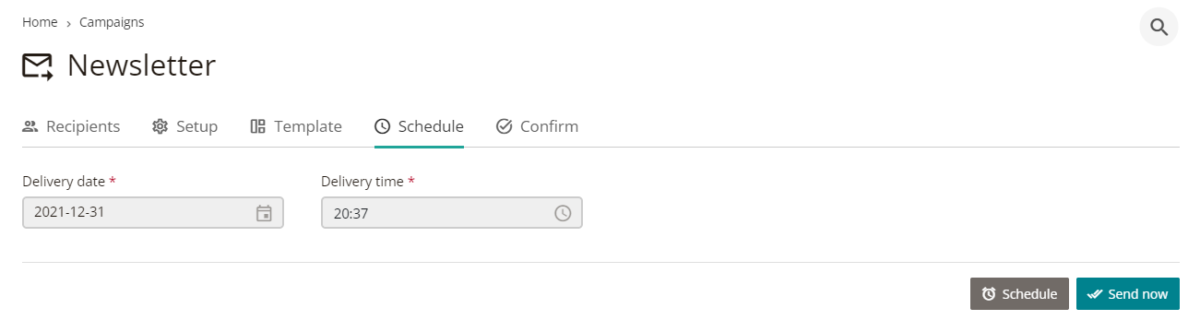
Schedule
In here, you will choose the time and date you want to send this email. I can be any future date and time OR you can just send now.
Confirm
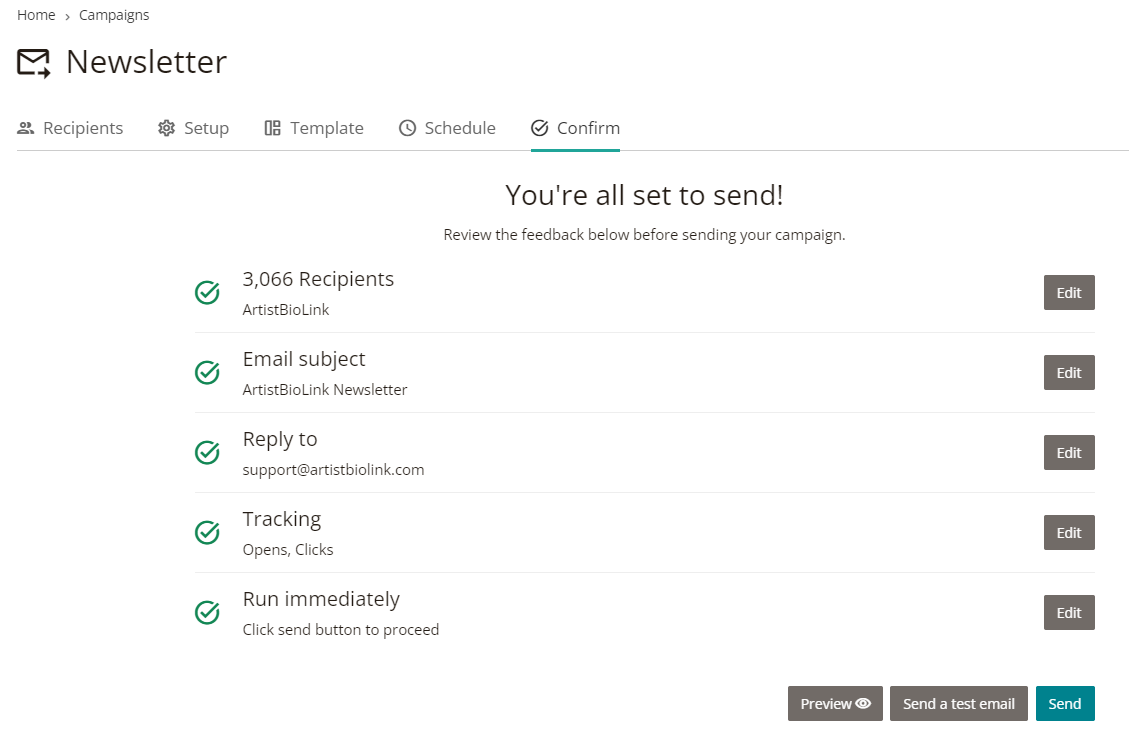
Verify your settings on last screen. After that use the 3 submit buttons at the bottom right:
- Preview: Will shows you preview of your email in a popup window.
- Send a test email: Will send you an email of your campaign. Verify if everything looks fine and you got the email.
- Send: The final submit to send your email to all recipients in your list.
That’s it! You can always track your Campaign’s email delivery status (Sent/Bounced/Open) in the Campaign statistics page.